Friday 27 April 2012

Finished Storage Boxes


Once all the pentagons were cut out, I sanded down the edges so that they would fit together neatly. I used wood glue to bond the pieces. I joined all the wooden pieces first creating a shell of my box, I then used a plastic adhesive to glue in the Perspex windows. The lids were glued together separately and are made up of two pentagons to make access easier; they will then be attached to the boxes by a hinge. I have painted a layer of clear matte varnish onto the wood to finish and protect it.


New Light Design


My light design had to change after my stencil failing to work, I decided to hand build a smaller version with slabs. Each segment is built up of 7 slabs; a slip had to be made for each segment as each segment is a different colour. Once all the segments were complete and separate, I cut out the space for the light to fit in. When the hole was cut I tidied up each segment and joined all the segments.  


I am going to let the piece dry slowly so that the join in the centre doesn't crack. I will fire the piece on a earthenware bisc firing at 1120 degrees, this should keep the colour of the clays richer. 

Thursday 19 April 2012

Stacking Storage Boxes


I produced my CAD stacking storage boxes in solid works to work out the scale of the boxes; I also produced a stacking maquette of how I want my piece to look. I used corel draw to draw out each individual pentagon that I would have cut with a laser cutter. I had to make 3 boxes each box descending in size and slotting into the box below. 


I have had all my pieces cut out, and now I just need to assemble it. I will be sanding each outer rings edge on an angle so that they fit together flush when I glue them. The outer wooden shell will be assembled first and then I will use a glue for acrylic to fix the Perspex windows inside. The lid will be made up of two pentagons glued together and will open from a hinge at the top of each box I texted different ways of opening the boxes and found that one pentagon didn’t leave enough room for your hand to reach in or even to fit in objects a little larger than one pentagon I want to look for small acrylic hinges that have no screw holes in. I would like to experiment my design with a thin piece of alluminum too as it would fold just like a 2D card net I could use rivets to hold the shape together and drill some patterns into the shape and use it as a tealight.


Tuesday 17 April 2012

CAD Final Design


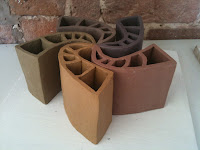
My CAD project has taken a turn into geometric shapes; I have created a range of maquettes and have chosen to use a dodecahedron as my starting point. I have experimented with the shape, looking at different sizes and stacking the shape on different faces, I liked the idea of stacking the shapes. My project brief is to create a piece of furniture; the 2D nets I used to make the 3D models interested me because they were hollow and I thought they could hold something. So I decided to create stacking storage containers each in the shape of a dodecahedron. I will stack 3 containers in descending size.

Instead of having fully blocked in shapes, I want to add see through panels within each polygon that makes up the dodecahedron, so that there is a transparency to see the inner angles and shapes through the container, however I don’t want to use clear Perspex as it could look cheap and will reveal the contents of the container too much, so I will use coloured frosted Perspex held in with a layered plywood frame. Each container will open from the top polygon which makes the user play around with the stacking of the object.   

I will attach each polygon segment with wood glue and put a hinge on each lid, the lids will need an indent to hold the container above, and the base of the stacking containers will need to have a double base. I have chosen to use 3 colours of Perspex, Purple, Pink and Blue.